Uncategorized

Individual Pumpkin Creamcheese Bundt Cakes

20131114-090424.jpg
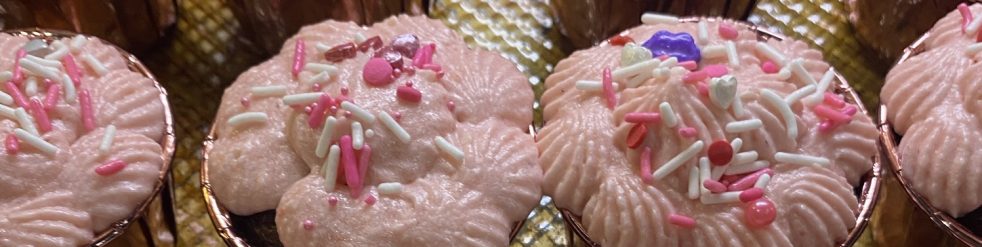
Using your favorite pumpkin pound cake recipe, make them in individual cakes to use as your name place card holders. This is the recipe I used last evening and then topped them with Cream cheese Frosting and Fall sprinkles!
8 oz softened cream cheese
3 sticks softened butter
1 cup brown sugar
2 cups granulated sugar
6 eggs
1 Table pumpkin pie spice
1 teas cinnamon
1 cup pumpkin purée
2 teas vanilla
3 1/4 cups cake flour or 3 1/4 cup all purpose flour minus 2 Tables

Preheat oven to 325. Measure flour into a bowl. Crack eggs into a separate bowl.
Meanwhile, cream butter, cream cheese and sugars until light and fluffy. Add pumpkin
and spices and vanilla. Alternate adding in flour and eggs, beginning and ending with flour. Do not over is. Pour batter into a greased and floured bundt pan or individual pans and bake until cake tests done when knife inserted in middle comes out clean.
Cool completely and either frost with cream cheese frosting or dust with powdered sugar.

Daily Thoughts

Cooking & Cleaning

It’s amazing how “company coming to town” will inspire me to clean house. It’s so easy to look past dusty baseboards and dirty windows. We seem to think that eventually it will rain and get the windows either dirtier which makes us think it’s no use wasting our energy, or the rain will kind of clean at least the outside of the window. But, the last couple of days, as I began to look around and try to look at our house through the eyes of company, I began to panic. When was the last time I actually dusted the whole house, not just dusting the table that we would be putting our feet on, alas, not wanting our socks to get dust on them?

Not wanting our friends, who are coming, to think we qualify for the Hoarders Program, we have been busy this week throwing out things that have been hiding under beds and the backs of closets. I started to worry that they might possibly drop something on the floor and bending over to pick up what they dropped, become so horrified of what they would see under their guest bed, that I have been crawling under beds all week, trying to at least organize what was under them. As of now, one of the beds serves as a cover for all the big pots and platters that won’t fit in the kitchen. We have the Christmas bed in the guest room that houses all the delicate Christmas décor which I was afraid might get broken if taken to storage. Now I just hope that the bed never breaks and my Christmas treasures get crushed by some of our oversized friends and family. We have couches which hide several  boxes of “out of season” clothes and blankets/quilts under them that won’t fit in the linen closet because I have all the extra paper towels and toilet tissue that we saved lots of money buying at Costco. With all the money we saved buying in quantity, we had enough left over to go buy a new chest to house all of the placemats and table cloths. Randy has been busy the last couple of nights, mapping out an escape route ,zig sagging through the furniture which lines our walls, just in case of fire of earthquake. He was very thoughtful and made an extra one for our guests. We would hate them to get caught in their bedroom, not knowing where to step to avoid the Christmas tree stand and the collection of Santas that are boxed under their bed.

Well, as of tonight, we are ready.  I went ahead and put the Christmas sheets on their bed. I thought they might like a little room in their closet to hang a few clothes. I rearranged the Easter decorations which were housed in the guest bath, making way for their toiletries. We were very thoughtful to move all the large cookie sheets that we keep between the sheets to keep off the dust. Didn’t think they would appreciate sleeping with those, especially since there are no cookies on them.  

Just in case I missed some dust and dirt, I placed chocolate candy on each of their pillows. Hopefully they will be so impressed with the gourmet chocolate they won’t notice the extra car mats that Randy ordered, (he thought he would have some here just in case his wore out in a couple of years), which are stored under the chair in the guest room.

Casseroles · Holiday Fare · Starches · Vegetables

Thanksgiving Tidbits

Last week I was watching a chef, who I cannot remember his name, showed a few ideas of how to decorate your table, without spending the money you were going to use to buy the matching jets from Neiman’s catalog. He used the miniature pumpkins and had one for each guests. Using a biscuit cutter, he pressed it into the top of each pumpkin making a round cut across the top. Using a spoon, he scooped this out (being careful not to cut all the way through, but created a hold to set in a small tea light candle. He then wrote with glue, each person’s name and then sprinkled glitter on the glue. This was what he used for name place cards. Looked so pretty and the candlelight at each place added such a warm glow to the table.

At our house, we would need to use the little battery tea lights, as the little darlings that we would have would have the entire table engulfed in flames before the turkey was carved. Thought it was worth passing on.

Another great idea is to make your sweet potatoes in individual servings. Using an orange, cut the orange in half horizontally. Scoop out the entire meat of the orange, reserving the juice. Use half as many oranges as you have people. In other words, if you are having 10 people, use 5 oranges, as they will be cut in half.

Mix up your favorite sweet potato casserole, but add some of the orange juice to the mixture.. Instead of just baking it in a casserole dish, spoon about 1/2 cup of the sweet potato mixture into the shell of the orange. Place in a lightly greased baking dish and bake in a preheated 350 degree oven for about 20-25 minutes or until it is bubbly. The last few minutes of baking, top with a marshmallow which has been cut in half, using only a half per shell. If your favorite recipe calls for streusel, omit the marshmallow and just top as you would with the streusel.

Breads · Casseroles · Holiday Fare · Starches

Wild Mushroom Bread Pudding

I am in love with bread puddings of all kinds. In a new  BH&G Christmas book, this recipe jumped off the page. Well, not actually, but when I saw the picture of it, I wanted to jump in the kitchen and make it. A great meatless main dish or a wonderful side to any type of meat, this will knock your socks off.

3 cups sliced assorted fresh wild mushrooms (such as cremini, Portobello, chanterelle or stemmed shitake) (8 oz)

2 medium shallots, sliced (1/4 cup)

3 cloves garlic, minced

2 tables olive oil

1/4 cup dry sherry or dry white wine

8 oz rosemary or onion focaccia, cut into 1″  cubes (about 6 cups)

4 eggs, lightly beaten

2 cups half & half

1 cup shredded Gruyere cheese (4 oz)

1 tables snipped fresh thyme

1 tables snipped fresh rosemary

1/2 teas salt

1/2 teas coarsely ground black pepper

Grease eight (10 oz) individual casseroles (ramekins); set aside. In a large skillet, cook mushrooms, shallots and garlic in hot oil over medium heat about 5 minutes or until tender. Carefully add sherry. Simmer, uncovered, until liquid is nearly evaporated. Transfer mixture to a large bowl. Stir in focaccia cubes.

In a medium bowl, combine eggs, half and half, cheese, thyme, rosemary, salt and pepper. Pour egg mixture over focaccia mixture, pressing with a wooden spoon to moisten all of the bread.

Divide pudding mixture between the prepared casseroles (ramekins, if using pyrex ramekins, will make probably 10 instead of 8).

 Cover and chill for 2 to 24 hours. Preheat oven to 325. Bake, uncovered for 35 to 40 minutes or until a knife inserted near the centers comes out clean. *If you used the Pyrex ramekins, you won’t need to bake them that long. Tests after 20-23 minutes for doneness.

Serves 8 to 10 depending on size of individual casseroles

Uncategorized

Thanks and Gratitude to Our Veterans

First of al I want to just say thanks to each Veteran who has sacrificed so much. Just sitting here this morning in a warm and comfortable home that had plenty of food and no fear of someone dictating what I can or cannot write makes me so grateful for the freedoms that we have that did not just happen. We owe so much to the men and women who have given up time, families, comforts and some even their lives for us to be living in this country. A million thanks from the bottom of my heart..our prayers that God would bless you and your families not just today, but throughout your lives.

Holiday Fare · Starches · Vegetables

Finicky Frosty’s Fine Spaghetti

IMG_1585IMG_1582
Last night, we (well, actually Frosty) was busy putting out lights on our patio so I would quit saying, “Frosty, I wish we could be the first ones on our street this year to put lights up.” So while he was outside, I got in the mood for Italian. I remembered this dish that I had seen on Facebook a few days ago and decided to make it. Wow, we loved it and cannot wait to have the leftovers again tonight. One pot dish and oh so easy. Here it is
4 1/2 cups vegetable broth
12 oz spaghetti
1/2 thinly sliced onion
4 garlic cloves
2 large stems of fresh basil
1 (16 oz) diced tomatoes (I used Hunts with basil and garlic)
2 tables olive oil.
Put everything, even the raw spaghetti, in a large pot that can be used on stove top. Sprinkle the olive oil over the top. Cover and bring to a boil. Turn down heat to simmer and cook, still covered, about 15 more minutes, stirring about every 5 minutes. Dish up into bowls and grate your favorite Italian cheese over the top. Season with salt and pepper to taste. As the pasta cooks with the other ingredient, it makes a great sauce. Even Frosty commented and said how good it was. Crusty bread with garlic and butter and you have a fantastic and quick dinner.

Uncategorized

578 Recipe for Left Over Turkey

Kay Vasquez from Roswell, NM sent this to me today telling me how she uses up left over turkey. So forget the first 577 ways, this one sounds great.

8 corn tortillas

2 cups shredded left over turkey

1 small can diced green chiles

1 cup sour cream

1 can cream of chicken soup

1/2 cup diced onions

2 cups shredded cheddar cheese

1 cups chicken broth.

Dip each corn tortilla in warm chicken broth. Drain on paper towels. Saute onions and green chiles in the oil and butter until tender. Add shredded turkey and about 1/2 cup of the chicken broth. (If you like the sauce a little less thick, add a little more broth.)

Grease a 8×8 baking dish. Mix soup and sour cream until blended. Place about 1/2 cup of this mixture In the bottom of the baking dish.

On each of the corn tortillas, place about 1 table of meat mixture in center of tortilla. Spread about 1 teas cheese over meat and roll up the tortilla and place seam side down in the dish. Continue until you have rolled all 8 of the tortillas. (if you have meat mixture left over, just use tortillas until you have used it up. When you have rolled all of the tortillas, spread the soup mixture over the enchiladas. Sprinkle remaining cheese over the top. Bake for 30 minutes at 350 or until they are bubbling and heated thoroughly.

Thanks Kay, am passing this on!.


After Thanksgiving, I use leftover turkey, cream of chicken mixed with sour cream, cheese, hot chopped green chilies, chopped onions, rolled into corn tortillas softened with chicken broth.  Bake and add more sour cream topping and cheese in last 10 minutes.  Great with guacamole, Spanish rice and pinto beans.  Complete meal and crowd favorite.

appetizers · Holiday Fare

Bite Size Chiles Rellenos

As most of you know, Peter and I are Mexican food junkies. When I was reading this recipe to him last night, he informed me that I needed to make these for him ASAP! They do sound so good and can’t wait to try them. It is such fun to look through these old (SL 1987) magazines. He fusses at me all the time for not being able to throw these out, but as the seasons of our lives change, so do our tastes and what looks and taste good to us. I probably didn’t even give these a second look back in 87, but now, can’t wait to make them. Another great appetizer for the upcoming parties.

1 cup flour

1/2 teas salt

1/2 teas garlic powder

1 cup beer (for all you Baptist, if you wear your Halloween mask when grocery shopping, none of the deacons will recognize you buying a beer for this recipe, you are safe. Or if this still seems too scary, borrow a cup from your Methodist neighbor)

2 (4 oz) cans whole green chiles, drained and seeded

4 oz Monterey Jack cheese, cut into 1/2″ cubes

Vegetable oil

Picante Sauce

Combine first 3 ingredients; stir will. Gradually add 1 cup beer, stirring until smooth. Cover and let stand 1 hour.

Cut green chiles lengthwise into 3/4″ wide strips. Roll each strip around a cheese cube, securing with a wooden pick. Cover and chill 1 hour.

Dip chile-cheese rolls in batter; allow excess to drip slightly. Deep-fry in hot oikl about 15 seconds or until golden brown. Drain on paper towels. Serve immediately with picante sauce.

Yields: about 2 dozen

Daily Thoughts · Desserts

Measuring Cups & Pie Crust

If you are one of those that  you are just now taking the Warranty Papers and Care Instructions out of the oven you have had for 5 years, you might not be aware that there is a difference in measuring cups. Today, a sweet young lady was making cookies and called me to ask me why her dough wasn’t the texture that she knew it should be. We went over the instructions and the ingredients and discovered that she had followed them to a T. When I ask her if she had used liquid measuring cups of dry measuring cups, she didn’t know that there was a difference and she had in fact used the ones meant to measure liquids. It can make a huge difference in your baked goods, not using the right measuring cups. The liquid measuring cups add more flour than what is intended. She ask me why they aren’t labeled, “liquid” or “dry”. At lunch I was relaying this story with a friend and she said it was years before she knew that fact. So for all of you out there that aren’t quite sure which is liquid or dry, the liquid measuring cups have lines and usually a pouring spout. Dry measuring cups are just labeled 1/2, 2/3, 1/4, 1, 1/3, etc.  They are made to where you can scrape across the top of the measuring cup to level it off. Does this make sense?

Also, for those of you who like to make your own pie crust, last night I made the pie crust recipe I found in Paula Deen Magazine. It is undoubtedly the absolute BEST pie crust I have ever had….it was flaky and had such a great flavor. I will never make any other recipe again.

2 1/2 cups flour

6 tables cold butter

6 tables cold shortening

1 tables sugar

1/2 teas salt

1/2 cup cold water

In a large bowl, combine the flour, sugar and salt. Cut in the butter and shortening with a pastry cutter until mixture resembles crumbs. Add water, 1 tables at a time, as you might not need all the water (I used 3 tables is all). Stir with a fork until mixture comes together. Remove from bowl and wrap in waxed paper or plastic wrap. Refrigerate for 30 minutes. Flour a sheet of parchment paper, waxed paper or your counter. Roll 1/2 of the dough mixture into a 12″ circle. Carefully fold in half and place in a 9″ pie plate. Fill with fruit filling. Repeat the procedure with the remaining dough. Place over the fruit and make a few slits in the top crust, allowing for steam to escape. Bake at 425 for 30-40 minutes or until crust is golden brown.\

If you are needing a single crust, you can freeze the other half and just use the bottom crust. Bake at 425 for about 15 minutes. Watch carefully as to not allowing to get to brown. Cool and use filling of your choice.

Uncategorized

Thumbie

Thumbie

The Thumbies In Motion
Use a Thumbie to make your thumbprint cookies, brownie cups.
Easier and faster than using your thumb and the indentions are uniform in size.

Will be giving one away Nov 23rd. Comment me your favorite thumbprint recipe. The one chosen will receive a Thumbie!